How we migrate client data to Bipsync
When onboarding to Bipsync, many clients will opt to bring historical data (e.g. research, notes, files, contacts, etc.) with them. This data can come from various sources including shared drives, note-taking software, email servers, databases and/or other RMS’. To support migrating content from all these places, we needed to build out tooling and processes to perform these data migrations securely and efficiently. We started by setting some goals to help us achieve this.
Our goals were:
- To develop a standardized process that can be used to streamline subsequent migrations with the same data sources.
- To support large amounts of data (potentially hundreds of thousands of notes, millions of data points, and hundreds of gigabytes of documents).
- To accelerate completion of migrations without the need for new development.
Improved tooling and standardization
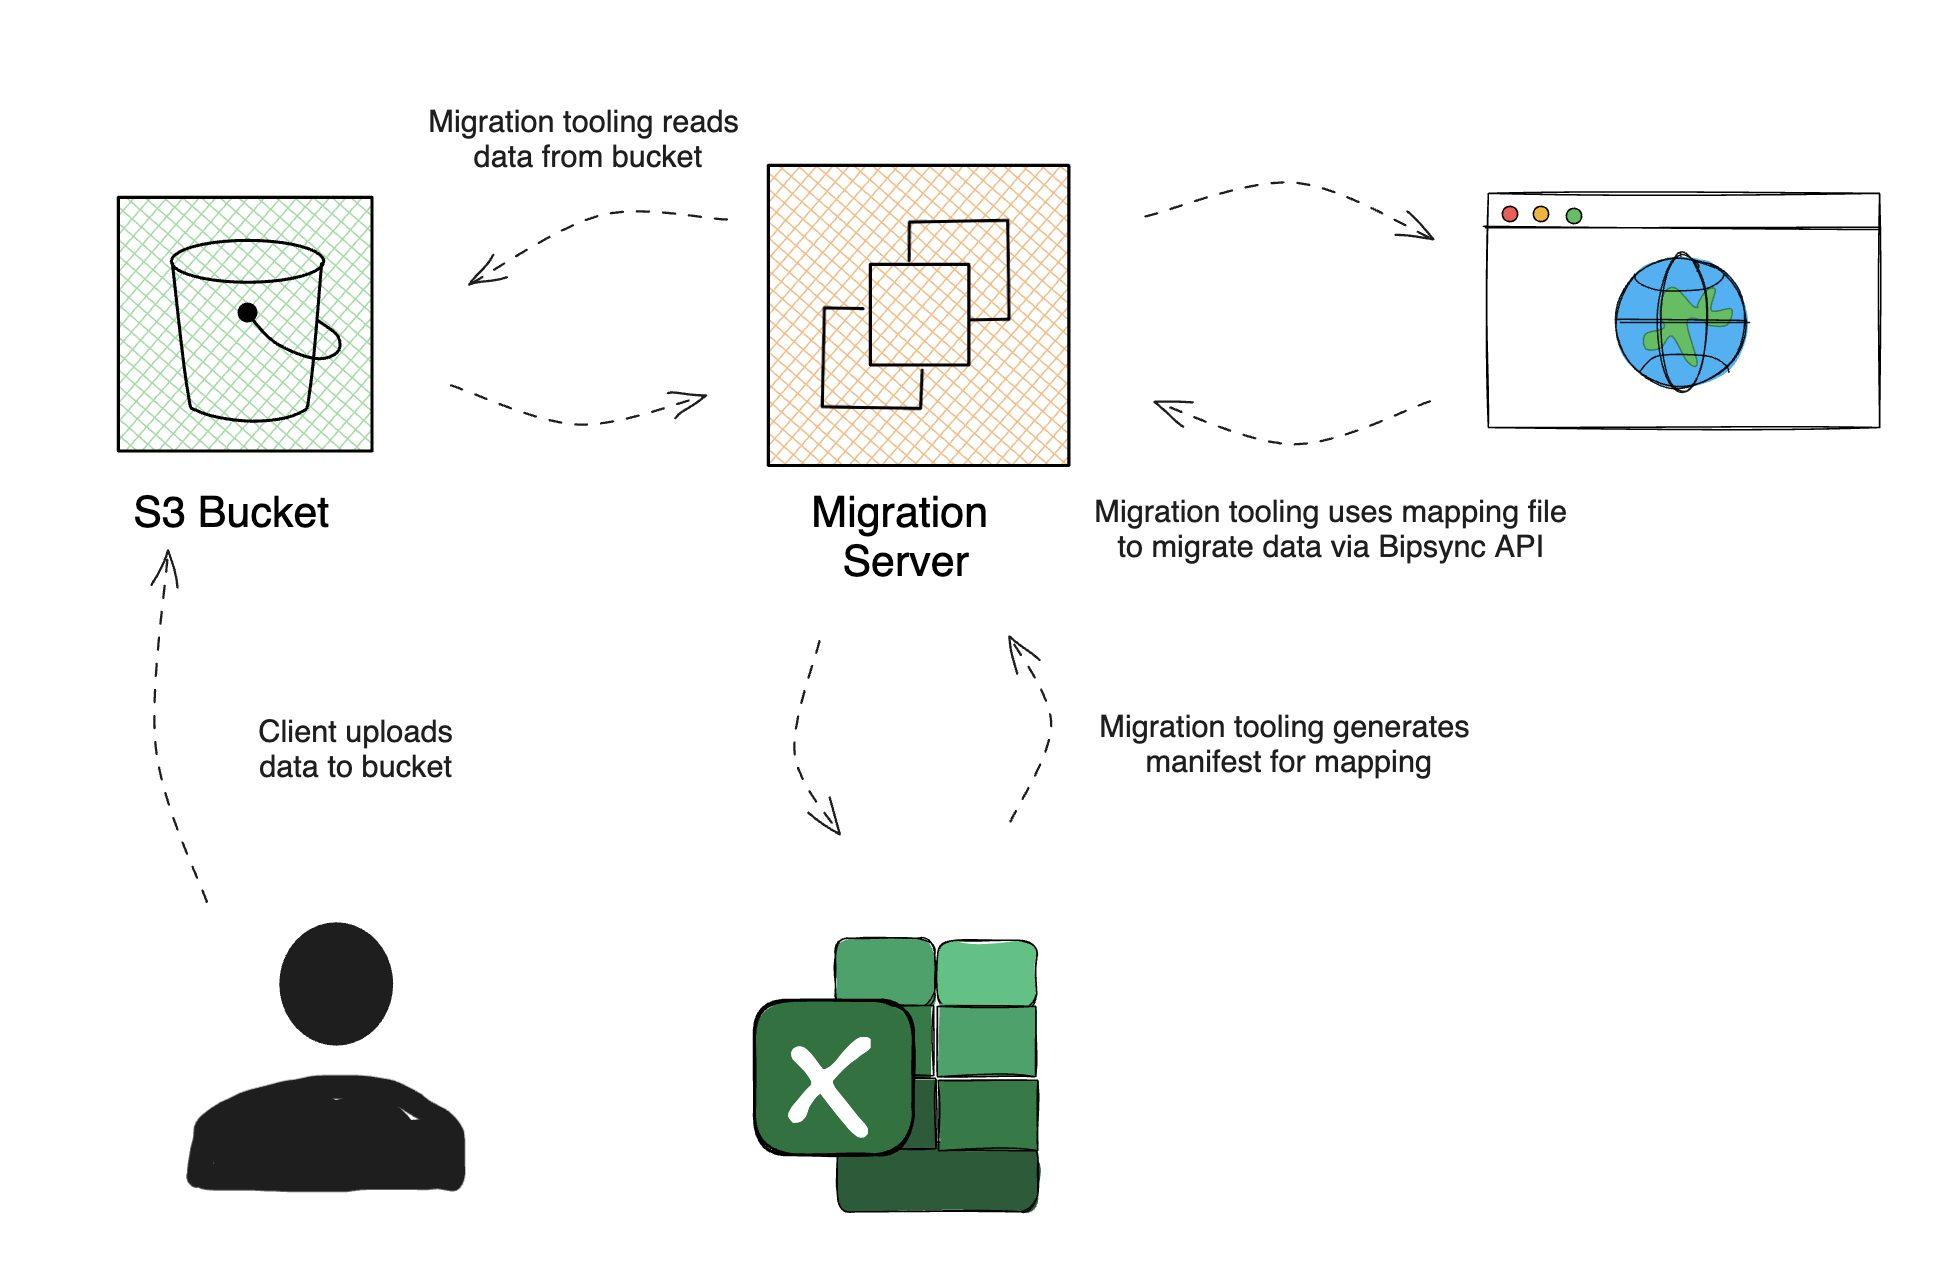
In order to standardize, we looked at how we could build reusable data management tools, formalize our data mapping process, and ingest the data into Bipsync efficiently. We wanted an easy way for our Customer Success team to map incoming data, and for this we decided to use Excel along with an ETL (extract, transform and load) process to transform the data into API-compatible JSON objects. Using Excel gives us a straightforward user interface (UI), which both our staff and our clients are already familiar with, as well as powerful functions to help analyze the data and format it as required.
Alongside this, we created a suite of tools to extract and transform data into our standardized format, output a file manifest, and map files as Excel workbooks. In cases where data was stored in a database, we also added support to read directly from the database using our migrator tool, which could then use the Excel workbooks to map the database.
We decided to write our command line tools in NodeJS because we were already familiar with Javascript. Its asynchronous nature is perfect for processing large amounts of data concurrently.
The migration process
To start the migration process we create a dedicated migration server, which is used to process the data and migrate it to Bipsync. All data provided by the client is stored securely within a dedicated Amazon S3 bucket.
At this point we perform any necessary preprocessing. For example, if we are provided with Outlook mail in the .msg format a tool is run to convert these to HTML files and extract attachments and metadata. This is then all added to a file manifest workbook which is generated by the preprocessing tool. We then take the generated manifest and map the metadata to their counterparts within Bipsync – typically this could be authors, company tags from tickers, note types, etc.
Before migrating the data into a preview environment for client review, we perform a dry run migration to ensure that all data points, such as created date, authors, and fields, are correctly mapped and validated. When we are happy with this we migrate the data into the client’s sandbox environment. Once validated by the client, we then repeat the process to migrate the data into their production environment.
Summary
Our new tooling and process have allowed us to migrate data at a greater efficiency than before, from a broader array of sources, streamlining the implementation process for our clients.
We’ve also improved our API to allow us to ingest more data and larger files, and have plans to improve it further in the coming year.
If you’re interested in learning more, get in touch with our team today!